
Smart Annotation for Revit
Smart Annotation is a Revit add-in that automates annotation and documentation workflows. Powered by AI and hosted on Amazon Web Services (AWS), it simplifies the process of tagging and dimensioning elements, boosting efficiency and consistency across projects.
Understanding that every team has unique documentation needs, Smart Annotation offers a highly customizable and user-friendly interface. It enables users to annotate drawings according to their own standards and preferences.
How to Install and Activate Smart Annotation
Download the installer from https://bimlogiq.com/product/smart-annotation.
Close Revit. Run the installer and follow the prompts.
Reopen Revit. You will see the Smart Annotation tab on the top ribbon.

Click Account, then log in with your credentials or sign up for a new account.

Click Activate to enable Smart Annotation.
Using Smart Annotation in Your Workflow
You can annotate views using the following commands:
Tag and Arrange: Automatically tags elements in the current view.
Add Job: Tags multiple views in a batch.

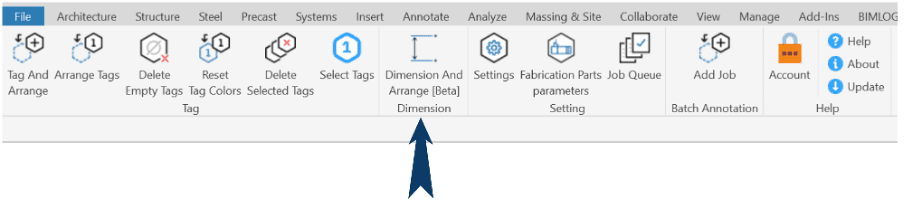
Dimension and Arrange: Places dimensions based on your settings.
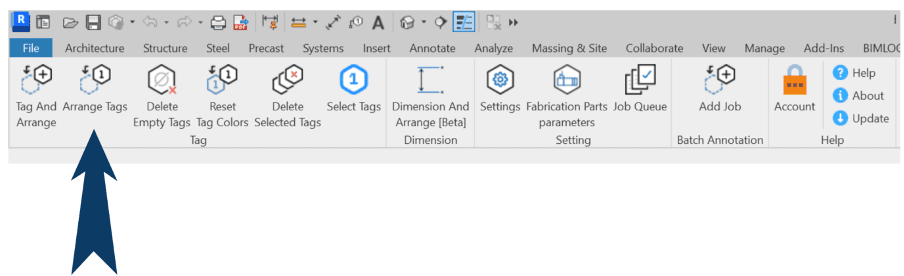
Arrange Tags: Repositions tags in already tagged views.
💡 Before using these tools, ensure your tag settings are configured.
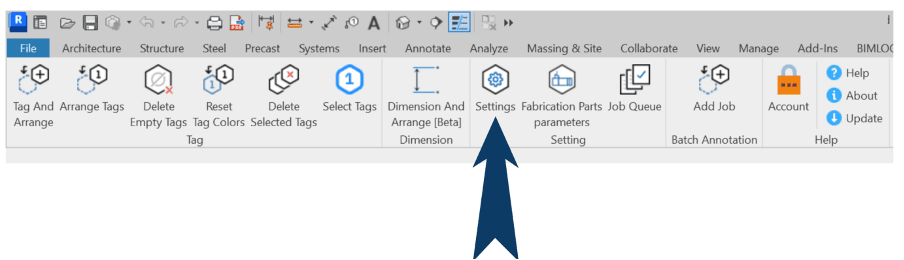
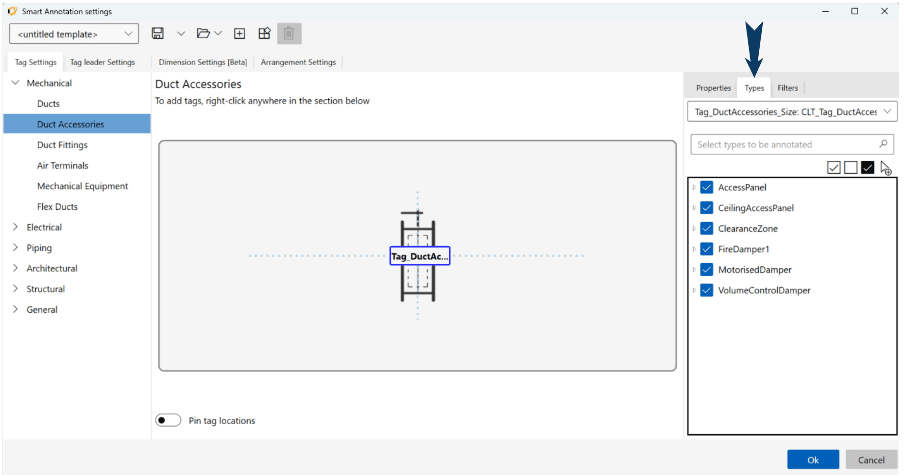
Tag Settings
The Tag Settings window allows you to define placement rules for each tag type.
Selecting Elements to Tag
On the left panel, select the category (e.g., Ducts, Pipes) loaded into your model.
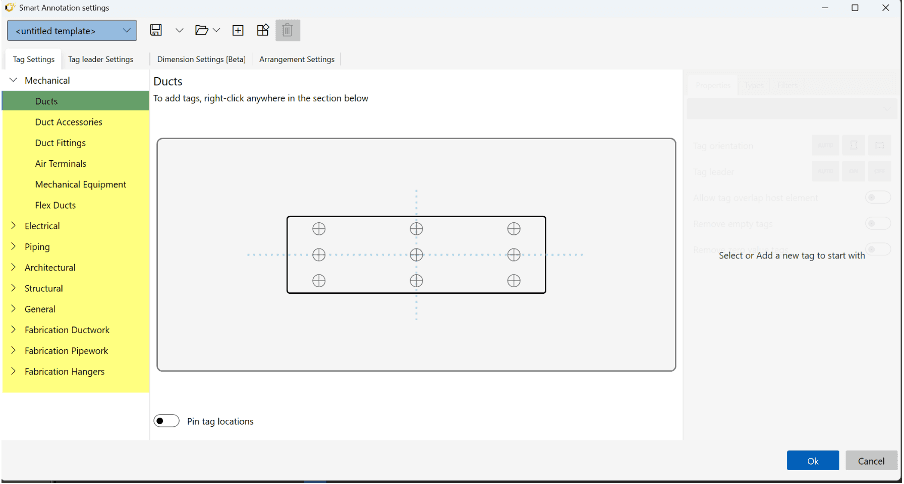
In the center area, right-click to assign the appropriate tag family.

Drag and drop the tag to your preferred location.

Pinning Tag Locations
Smart Annotation scans available space around elements to determine optimal tag placement. If you have a preferred side, you can pin the tag to that location, prioritizing it for placement.

Tag Orientation
Set the tag to:
Auto: Follows the orientation of the host element.
Vertical
Horizontal
⚠️ If the tag family rotates with its host component, orientation controls will be disabled.
Tag Leader
You can configure leader behavior:
Auto: Adds a leader if the tag is far or overlaps other elements.
Off: Forces the tag to be close enough to not require a leader.
Overlapping Hosts
By default, tags avoid overlapping host elements. You can override this by enabling Allow Tag Overlap Host Element.
Remove Empty/Zero Value Tags
Enable this option to skip tags that return no value.
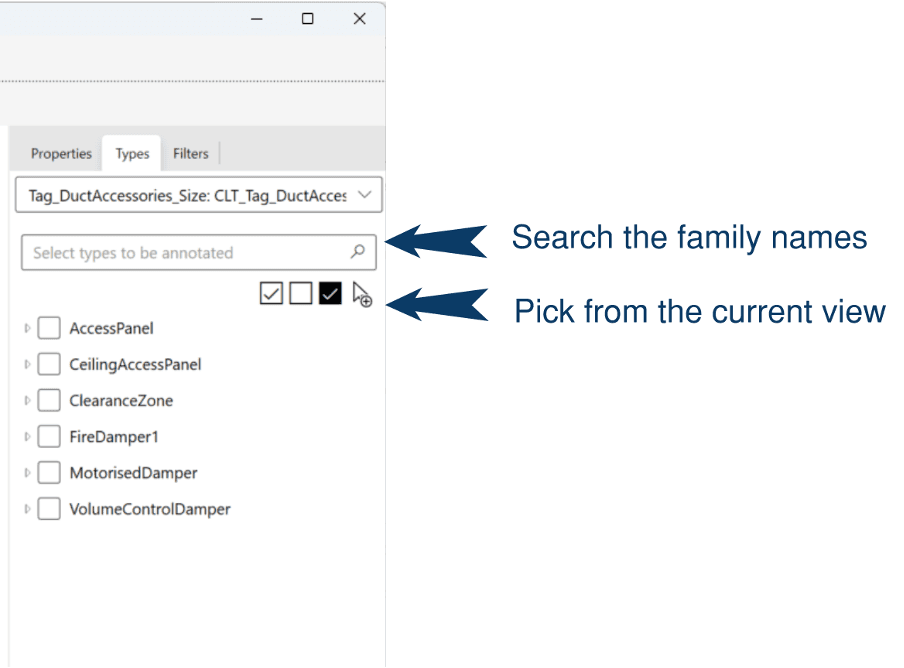
Type Tab
Specify which family types or instances you want to tag. Use the search bar or select from visible families in the current view.
Filter Tab
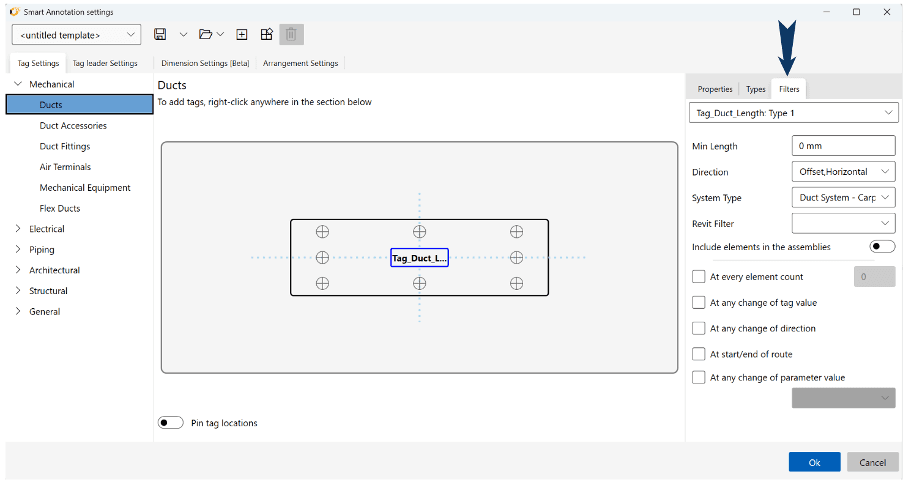
Use filters to limit unnecessary tags in views.
Min Length: Ignores short elements.
Direction: Filters based on orientation—horizontal, vertical (e.g., risers), or offset (angled).
System Types: Filter by system type.
Revit Filters: Import Revit's visibility filters.
Include Assemblies: Enable this to tag elements within assemblies.
Additional toggles like:
Tag at every direction change
Tag at every size change
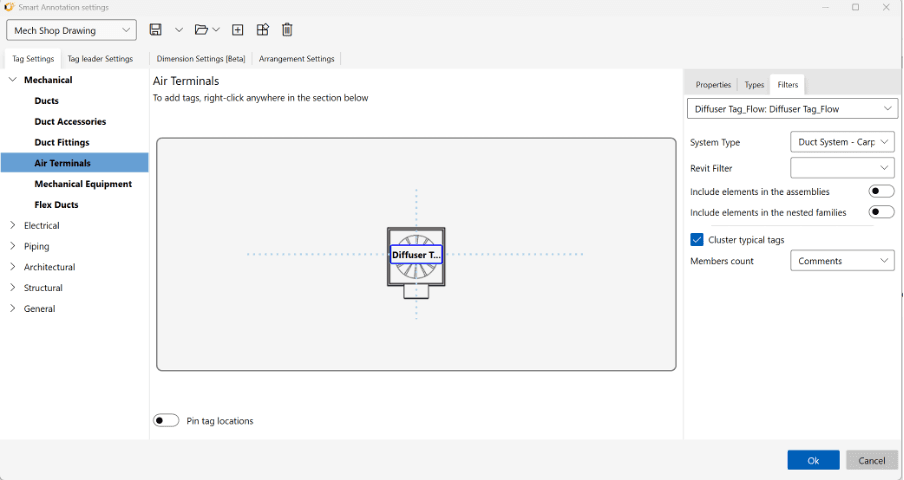
Cluster Typical Tag Filter
For clustered elements like air terminals, tag only one and write the count in a selected parameter (e.g., "Comments").
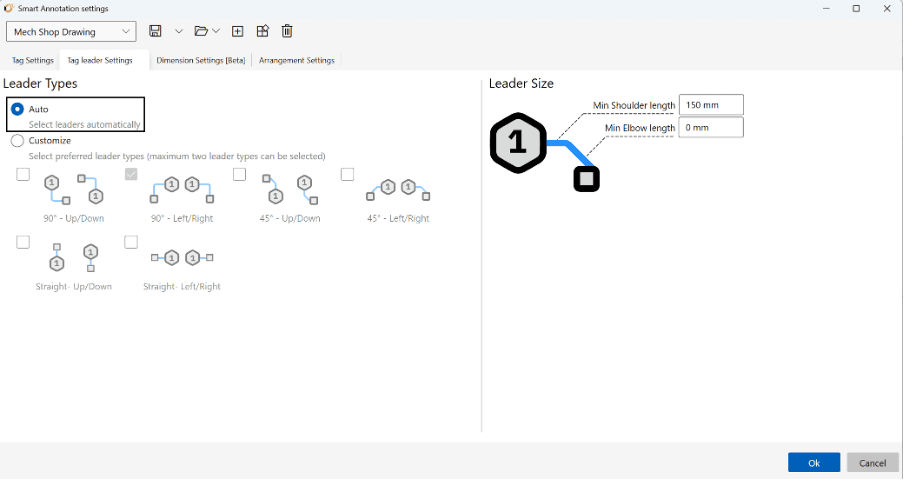
Tag Leader Settings
Customize leader lines:
Shoulder Length
Elbow Length
This ensures tags maintain a clean visual format with adequate spacing.
📏 These values are measured in Model Space, not Paper Space.
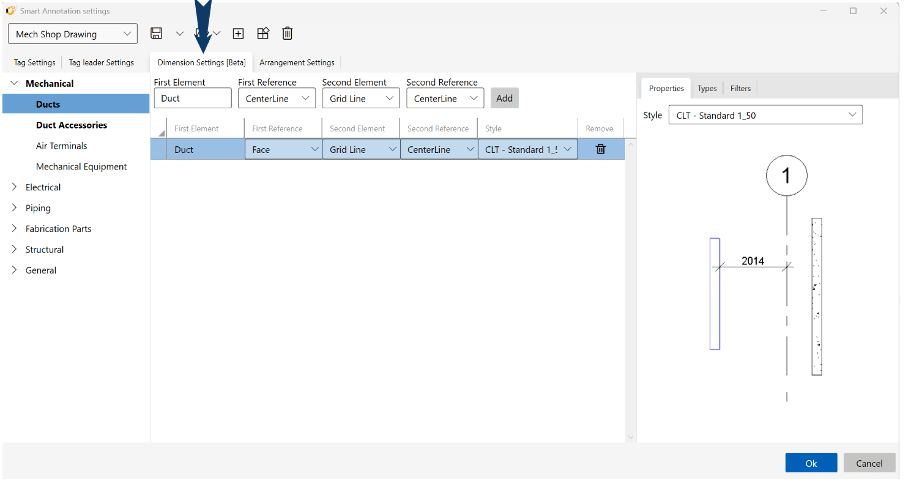
Dimensioning Settings
Choose which elements to dimension and set references:
The first reference is the object to be dimensioned.
The second reference is the object you want to dimension from (e.g., gridlines, walls, level lines).
For ducts and pipes, dimensions are placed for the overall run—not each segment.
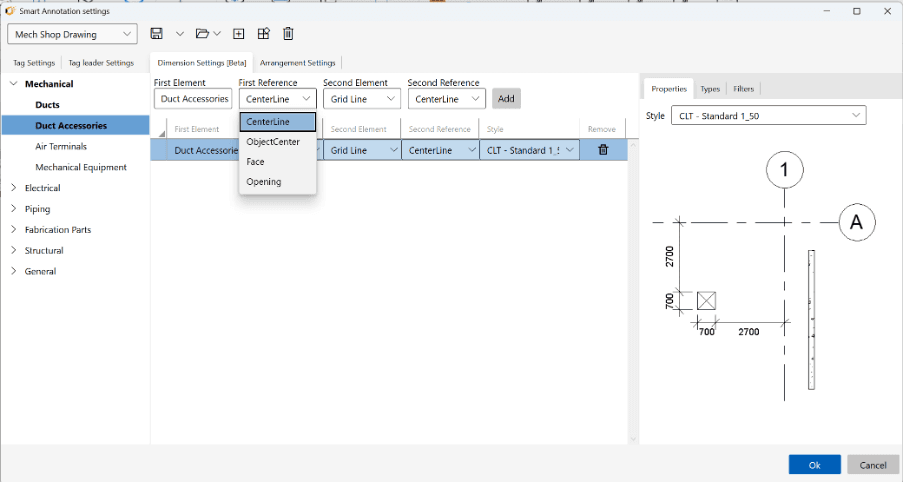
Dimension Reference Options
Options depend on the object type (e.g., face, opening, centerline).
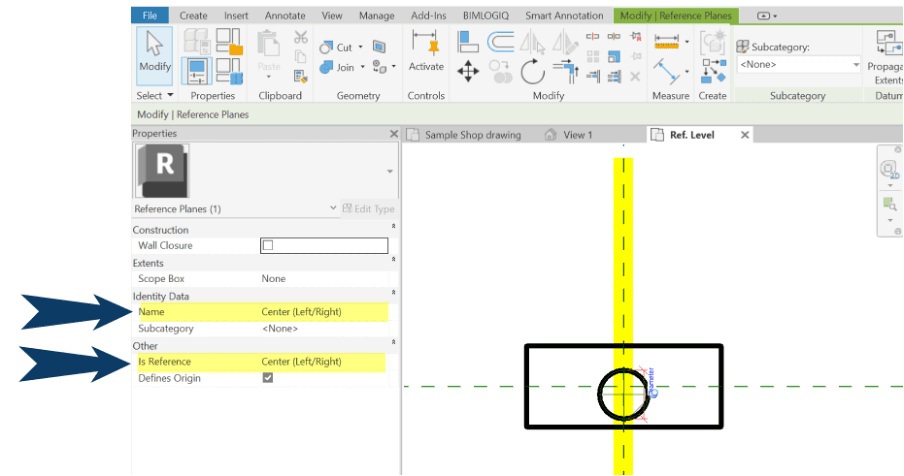
✅ To use centerline dimensions, ensure the family has center reference lines marked as Center (Left/Right) and Center (Front/Back).

Arrangement Settings

Tag Alignment Mode
Strict Alignment: Ensures tag alignment, even if it requires longer leaders.
Relaxed Alignment: Tags are placed closer to elements with less focus on alignment.
Tag Grouping
Stack Tags: Group multiple tags for the same element with one leader.
Keep Tags Separate: Prevents grouping even if tags are placed outside the object.

Avoiding Objects
You can specify which objects Smart Annotation should avoid when placing tags or dimensions. There's also an option to apply this to linked files.
✅ Check "Also avoid selected elements in link files" to apply the rule across linked models.